【d3js】d3.brush 相关使用-灵析社区
 JOHO
JOHO前言
在需要选中多个或者范围内的图形的时候就需要用到brush了,提高用户体验嘛。不用再一个一个选中了

准备数据图形
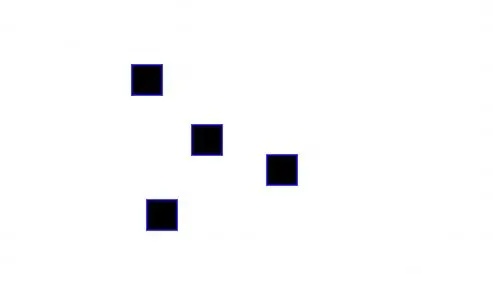
先绘制出来几个矩形的小方框,为框选做准备 效果图如下:
code
<!DOCTYPE html>
<html lang="en">

<head>
  <meta charset="UTF-8">
  <meta http-equiv="X-UA-Compatible" content="IE=edge">
  <meta name="viewport" content="width=device-width, initial-scale=1.0">
  <title>Document</title>
  <style>
    #container {
      width: 500px;
      margin: 50px auto 0;
    }
  </style>
</head>

<body>
  <div id="container">
    <button onclick="startBrush()">开启框选</button>
    <button onclick="stopBrush()">停止框选</button>
  </div>
</body>

</html>
<script src="https://d3js.org/d3.v5.min.js"></script>

<script>
  const svg = d3.select('#container')
    .append('svg')
    .attr('width', 500)
    .attr('height', 500);

  const data = [
    { id: 1, fill: 'black', x: 10, y: 10 },
    { id: 2, fill: 'black', x: 50, y: 50 },
    { id: 3, fill: 'black', x: 100, y: 70 },
    { id: 4, fill: 'black', x: 20, y: 100 }
  ];

  draw(); // 绘制
  function draw() {
    const update = svg.selectAll('rect')
      .data(data, d => d.id);

    //修改层
    update.attr('x', (d, idx) => d.x)
      .attr('y', (d, idx) => d.y)
      .attr('fill', (d) => d.fill)

    //渲染层
    const enter = update.enter();

    //删除层
    const exit = update.exit();

    enter.append('rect')
      .attr('width', 20)
      .attr('height', 20)
      .attr('id', d => d.id)
      .attr('x', (d, idx) => d.x)
      .attr('y', (d, idx) => d.y)
      .attr('fill', (d) => d.fill)
      .attr('stroke', 'blue')
      .attr('strokeWidth', 1)

    exit.remove()
  }


  function startBrush() { // 开始框选
  };


  function stopBrush() { // 关闭框选
  };

</script>
开始绘制brush
使用d3.brush绘制出框选效果,使用d3.event.selection获取到框选的范围,数据结构是[[minX, minY], [maxX, maxY]]样;
code
 let bruchGroup = null;

 function startBrush() { // 开始框选
    bruchGroup = svg.append('g').attr('class', 'brush')
      .call(d3.brush().on('end', () => {
        // brush range
        const [minX, minY] = d3.event.selection[0] || []; // 获取到坐标范围
        const [maxX, maxY] = d3.event.selection[1] || [];
        console.log(minX, minY, 'minX, minY', maxX, maxY, 'maxX, maxY')

        // 需要再这块写你的框选逻辑,咱们就做高亮效果吧!!!!!!!!!!
        stopBrush();
      }))
  };

    function stopBrush() { // 关闭框选
    if (typeof bruchGroup?.remove === 'function') {
      bruchGroup.remove(); // 使用remove 清除框选效果
      bruchGroup = null;
    }
  };
判断矩形是不是框选范围
可以把brush看作一个绘制的图层的矩形,使用d3.event.selection能获取到矩形的四个点的坐标,反之咱们判断小矩形方块有咩有被框选到就是判断这些小矩形方块的坐标■是不是再这个框选的矩形上。
- 把小矩形方块当作一个点
- 把框选矩形当作一个矩形(四个坐标已取到)
- 判断在不在矩形上(是不是大于左上角 && 是不是小于右下角)
code
const selected = []; //存放框选范围内的小方块id

function startBrush() { // 开始框选
  bruchGroup = svg.append('g').attr('class', 'brush')
    .call(d3.brush().on('end', () => {
      // brush range
      const [minX, minY] = d3.event.selection[0] || [];
      const [maxX, maxY] = d3.event.selection[1] || [];
      console.log(minX, minY, 'minX, minY', maxX, maxY, 'maxX, maxY')

      data.forEach(({ x, y, id }) => { // 新增代码部分
        if (x >= minX && x <= maxX && y >= minY && y <= maxY) { // 判段点在不在矩形上
          selected.push(id);
        }
      })

      console.log(selected, 'selected...')
      stopBrush();
  }))
};
实现框选更改小方块的颜色逻辑
使用selected存放再范围内的id, 把框选到的改成红色。
效果图:
const selected = []; //存放框选范围内的小方块id

function startBrush() { // 开始框选
  bruchGroup = svg.append('g').attr('class', 'brush')
    .call(d3.brush().on('end', () => {
      // brush range
      const [minX, minY] = d3.event.selection[0] || [];
      const [maxX, maxY] = d3.event.selection[1] || [];
      console.log(minX, minY, 'minX, minY', maxX, maxY, 'maxX, maxY')

      data.forEach(({ x, y, id }) => { // 新增代码部分
        if (x >= minX && x <= maxX && y >= minY && y <= maxY) { // 判段点在不在矩形上
          selected.push(id);
        }
      })

      updateColor();
      stopBrush();
  }))
};

function updateColor() { // 更新小方块的颜色
    data.forEach((item) => {
      if (selected.includes(item.id)) {
        item.fill = 'red'; // 把数据的fill 改成 红色
      }
    });
    draw(); // draw 再之前实现了数据绑定 会更具数据修改自动更新()
};
源码
<!DOCTYPE html>
<html lang="en">

<head>
  <meta charset="UTF-8">
  <meta http-equiv="X-UA-Compatible" content="IE=edge">
  <meta name="viewport" content="width=device-width, initial-scale=1.0">
  <title>Document</title>
  <style>
    #container {
      width: 500px;
      margin: 50px auto 0;
    }
  </style>
</head>

<body>
  <div id="container">
    <button onclick="startBrush()">开启框选</button>
    <button onclick="stopBrush()">停止框选</button>
  </div>
</body>

</html>
<script src="https://d3js.org/d3.v5.min.js"></script>

<script>
  let bruchGroup = null;
  const selected = [];
  const svg = d3.select('#container')
    .append('svg')
    .attr('width', 500)
    .attr('height', 500);

  const data = [
    { id: 1, fill: 'black', x: 10, y: 10 },
    { id: 2, fill: 'black', x: 50, y: 50 },
    { id: 3, fill: 'black', x: 100, y: 70 },
    { id: 4, fill: 'black', x: 20, y: 100 }
  ];

  draw(); // 绘制
  function draw() {
    const update = svg.selectAll('rect')
      .data(data, d => d.id);

    //修改层
    update.attr('x', (d, idx) => d.x)
      .attr('y', (d, idx) => d.y)
      .attr('fill', (d) => d.fill)

    //渲染层
    const enter = update.enter();

    //删除层
    const exit = update.exit();

    enter.append('rect')
      .attr('width', 20)
      .attr('height', 20)
      .attr('id', d => d.id)
      .attr('x', (d, idx) => d.x)
      .attr('y', (d, idx) => d.y)
      .attr('fill', (d) => d.fill)
      .attr('stroke', 'blue')
      .attr('strokeWidth', 1)

    exit.remove()
  }


  function startBrush() { // 开始框选
    bruchGroup = svg.append('g').attr('class', 'brush')
      .call(d3.brush().on('end', () => {
        // brush range
        const [minX, minY] = d3.event.selection[0] || [];
        const [maxX, maxY] = d3.event.selection[1] || [];
        console.log(minX, minY, 'minX, minY', maxX, maxY, 'maxX, maxY')

        data.forEach(({ x, y, id }) => {
          if (x >= minX && x <= maxX && y >= minY && y <= maxY) {
            selected.push(id);
          }
        })


        console.log(selected, 'selected...')

        updateColor();
        stopBrush();
      }))
  };


  function stopBrush() { // 关闭框选
    if (typeof bruchGroup?.remove === 'function') {
      bruchGroup.remove();
      bruchGroup = null;
    }
  };


  function updateColor() {
    data.forEach((item) => {
      if (selected.includes(item.id)) {
        item.fill = 'red';
      }
    });
    draw();
  }


</script>
总结
用d3.brush实现了一个框选更改图形颜色的小例子,大家应该会对框选有个大概的认识了。
- demo逻辑还不完善,比如我给设置红色了再什么场景下应该取消设置的红色呢(点击画布空白处),大家可以考虑下用什么方案去实现呢?
- 如果抛开
d3.brush你还会实现框选嘛?
阅读量:571
点赞量:0
收藏量:0