【看了必懂D3JS(二)】d3js data、datum 实现一个数据驱动绘制的方法-灵析社区
 JOHO
JOHOtext
text是用来绘制文本的
- 用法:
<!DOCTYPE html>
<html lang="en">
<head>
    <meta charset="UTF-8">
    <meta http-equiv="X-UA-Compatible" content="IE=edge">
    <meta name="viewport" content="width=device-width, initial-scale=1.0">
    <title>Document</title>
</head>
<body>
    <div id="main">
        <p class="item"></p>
        <p class="item"></p>
        <p class="item"></p>
        <p class="item"></p>
        <p class="item"></p>
        <p class="item"></p>
        <p class="item"></p>
        <p class="item"></p>
        <p class="item"></p>
        <p class="item"></p>
        <p class="item"></p>
    </div>
</body>
</html>
<script src="https://d3js.org/d3.v5.min.js"></script>

<script>
 //style
let main= d3.select('#main')
            .style('width', '500px')
            .style('height', '500px');

main.selectAll('.item')
    .style('height', '30px')
    .style('width', '100%')
    .style('background', (d, i) => {
        console.log(d,'d>>>>>>.........')
       return i % 2 ? 'red' : 'blue'
    })
    .text('p')

</script>
呈现效果:

声明:再svg重绘制文本就直接使用svg的text绘制的就行了 用d3js绘制大致这个样:
d3.select('svg')
  .append('text')
  .attr('x', 10)
  .attr('y', 20)
  .style('cursor', 'default')
  .text('svg-text')
insert
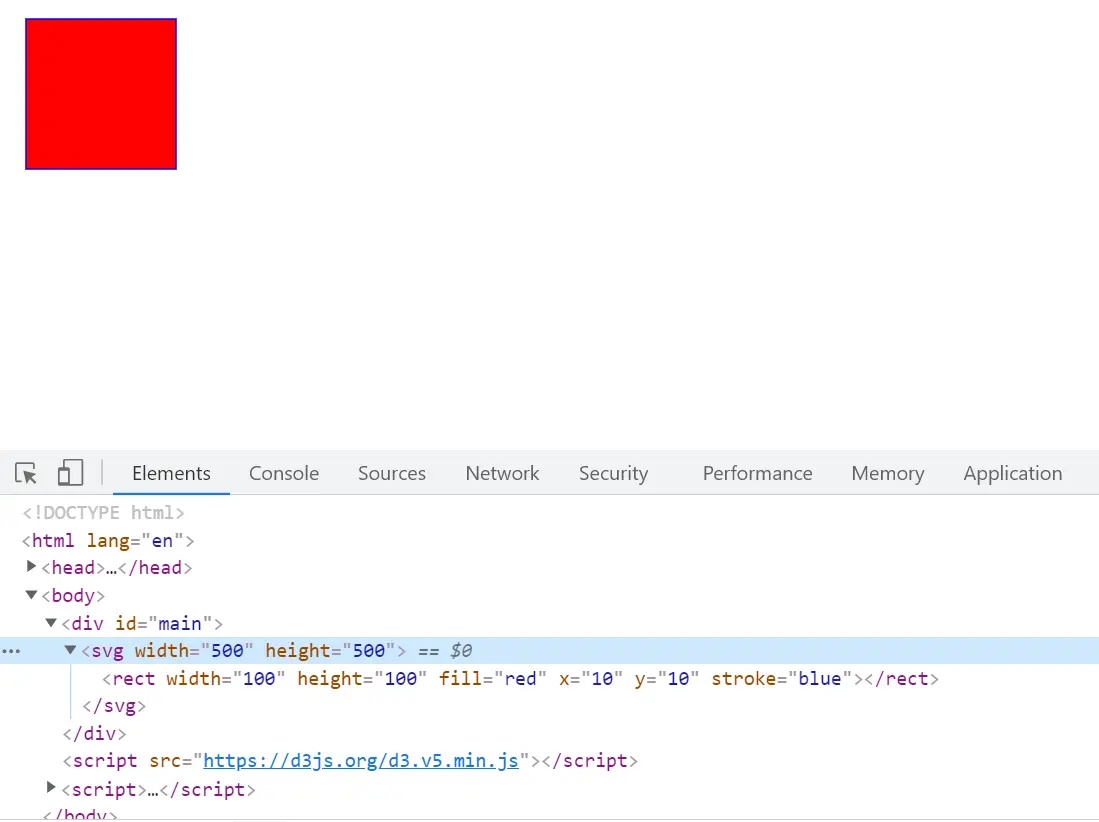
append 是像元素后面追加,insert是像元素前追加用法跟append一样
- 用法示例:
<!DOCTYPE html>
<html lang="en">
<head>
    <meta charset="UTF-8">
    <meta http-equiv="X-UA-Compatible" content="IE=edge">
    <meta name="viewport" content="width=device-width, initial-scale=1.0">
    <title>Document</title>
</head>
<body>
    <div id="main">
    </div>
</body>
</html>
<script src="https://d3js.org/d3.v5.min.js"></script>

<script>
// append
const svg = d3.select('#main')
              .insert('svg')
              .attr('width', 500)
              .attr('height', 500);

 //append一个rect 添加一些属性
 svg.insert('rect')
    .attr('width', 100)
    .attr('height', 100)
    .attr('fill', 'red')
    .attr('x', 10)
    .attr('y', 10)
    .attr('stroke', 'blue')
</script>
呈现效果:
classed
classed 多增加一个class类 就是一个元素绑定多个class
- 用法示例:
d3.select('svg')
  .class('svg')
  .classed('svg-container')
进入今日分享主题
d3js数据绑定
data篇
- 1、data是绑定一个数组的形势
data(data)这个样默认是绑定的data的索引,也可以这个样data(data, (d,idx) => d)指定绑定某个字段,这个绑定很重要后面会说到 - 2、绘制多个rect 然后给他们分享绑定data, 大家可以观察下最后的
console.log()会输出对应绑定的1、2、3、4、5、6、7
<!DOCTYPE html>
<html lang="en">
<head>
    <meta charset="UTF-8">
    <meta http-equiv="X-UA-Compatible" content="IE=edge">
    <meta name="viewport" content="width=device-width, initial-scale=1.0">
    <title>Document</title>
</head>
<body>

</body>
</html>
<script src="https://d3js.org/d3.v5.min.js"></script>

<script>
    const svg = d3.select('body')
                .append('svg')
                .attr('width', 500)
                .attr('height', 500);


    const data = [1,2,3,4,5,6,7];

    data.forEach((item => {
        svg.append('rect')
        .attr('width', 20)
        .attr('height', 20)
        .attr('x', 20 * item)
        .attr('y', 20 * item)
        .attr('fill', 'red')
    }))


    svg.selectAll('rect')
       .data(data)
       .attr('stroke',(d,idx) => {
           console.log(d,'d')
       })
</script>
效果呈现:

datum
datum 跟data的作用是一样的都是绑定数据,他是绑定单个数据
- 用法示例
svg.select('rect')
       .datum(1)
       .attr('stroke',(d,idx) => {
           console.log(d,'d')
       })
data、datum获取数据
上面讲到绑定数据,那绑定的数据一样可以获取了; datum 跟 data 用法一致不过他获取到的是个单个数据 代码最后一行console.log()输出:[1,2,3,4,5,6,7]
- 用法示例:
<!DOCTYPE html>
<html lang="en">
<head>
    <meta charset="UTF-8">
    <meta http-equiv="X-UA-Compatible" content="IE=edge">
    <meta name="viewport" content="width=device-width, initial-scale=1.0">
    <title>Document</title>
</head>
<body>

</body>
</html>
<script src="https://d3js.org/d3.v5.min.js"></script>

<script>
    const svg = d3.select('body')
                .append('svg')
                .attr('width', 500)
                .attr('height', 500);


    const data = [1,2,3,4,5,6,7];

    data.forEach((item => {
        svg.append('rect')
        .attr('width', 20)
        .attr('height', 20)
        .attr('x', 20 * item)
        .attr('y', 20 * item)
        .attr('fill', 'red')
    }))


    svg.selectAll('rect')
       .data(data)
       .attr('stroke',(d,idx) => {
           console.log(d,'d')
       })

    console.log(svg.selectAll('rect').data(),'data')
</script>
enter
大家应该记得上面我是用forEach创建的rect 是不是挺费劲的,d3也有自己的方式结合data实现多个元素创建。enter是把不足的给补充了,例如下面代码是选中多个rect绑定然后调用enter,之后再append就是不足data的用append方法给添加上去 enter用法示例
<!DOCTYPE html>
<html lang="en">
<head>
    <meta charset="UTF-8">
    <meta http-equiv="X-UA-Compatible" content="IE=edge">
    <meta name="viewport" content="width=device-width, initial-scale=1.0">
    <title>Document</title>
</head>
<body>

</body>
</html>
<script src="https://d3js.org/d3.v5.min.js"></script>

<script>
    const svg = d3.select('body')
                .append('svg')
                .attr('width', 500)
                .attr('height', 500);


    const data = [1,2,3,4,5,6,7];


    svg.selectAll('rect')
       .data(data)
       .enter()
       .append('rect')
       .attr('width', 20)
       .attr('height', 20)
       //d代表绑定的数据,idx代表索引,再d3中每个方法都可以用回调函数
       .attr('x', (d,idx) => 20 * d)
       .attr('y', (d,idx) => 20 * d)
       .attr('fill', 'red')
       .attr('stroke', 'blue')
       .attr('strokeWidth',1)

</script>
呈现效果:

exit
exit 是当数据少,选中的多的时候不自动填充,可以搭配remove使用把多余的元素给去掉
用法示例:
<!DOCTYPE html>
<html lang="en">
<head>
    <meta charset="UTF-8">
    <meta http-equiv="X-UA-Compatible" content="IE=edge">
    <meta name="viewport" content="width=device-width, initial-scale=1.0">
    <title>Document</title>
</head>
<body>

</body>
</html>
<script src="https://d3js.org/d3.v5.min.js"></script>

<script>
    const svg = d3.select('body')
                .append('svg')
                .attr('width', 500)
                .attr('height', 500);


    const data = [1,2,3,4,5,6,7];

    [1,2,3,4,5,6,7,8,9,10].forEach((item => {
        svg.append('rect')
        .attr('width', 20)
        .attr('height', 20)
        .attr('x', 20 * item)
        .attr('y', 20 * item)
        .attr('fill', 'red')
    }))


    svg.selectAll('rect')
       .data(data)
       .exit()
       .remove()

    console.log(svg.selectAll('rect').data(),'data')
</script>
如何实现一个数据驱动的方法呢?
其实再data 数据绑定可以分为3层; 1、渲染层;2、修改层;3、删除层;
- 1、渲染层:
enter()(数据绑定会根据你绑定的值区分下次调用有咩有进入enter层) - 2、修改层:
data()(数据绑定会根据你绑定的数据绑判断你有没有修改数据) - 3、删除层:
exit()(数据绑定会根据你绑定的数据检测到你删除了那些数据)
代码分析数据绑定的层次
3个层次都有了,大家可以先暂时这么理解
<!DOCTYPE html>
<html lang="en">
<head>
    <meta charset="UTF-8">
    <meta http-equiv="X-UA-Compatible" content="IE=edge">
    <meta name="viewport" content="width=device-width, initial-scale=1.0">
    <title>Document</title>
</head>
<body>

</body>
</html>
<script src="https://d3js.org/d3.v5.min.js"></script>

<script>
    const svg = d3.select('body')
                .append('svg')
                .attr('width', 500)
                .attr('height', 500);


    const data = [{id: 1, fill: 'red', x: 20, y: 20}, {id: 2, fill: 'blue', x: 40, y: 40}, {id: 3,fill: 'yellow',x: 60, y: 60}, {id: 4, fill: 'black',x: 80, y: 80}];


   //修改层
   const update = svg.selectAll('rect')
       .data(data)

    //渲染层
    const enter = update.enter();

    //删除层
    const exit = update.exit();

    enter.append('rect')
       .attr('width', 20)
       .attr('height', 20)
        .attr('x', (d,idx) => d.x)
        .attr('y', (d,idx) => d.y)
        .attr('fill', (d) => d.fill)
       .attr('stroke', 'blue')
       .attr('strokeWidth',1)

    exit.remove()
</script>
呈现效果:

封装成一个数据驱动的函数
把上面的那些层次放进一个函数里面,实现数据驱动。大家大致可以这么理解3个层次,
- 就是第一次调用函数绘制: 肯定会进入绘制层,其他层次都是空的
- 第二次调用函数绘制绘制就是说数据变了(比如改变颜色fill了)那就会把改变的这条数据进入修改层
- 再调用函数再绘制(删除了一条数据,新增了一天数据)这个就是根据你绑定的
.data(data d => d.id)检测的了默认是索引
代码示例:
<!DOCTYPE html>
<html lang="en">
<head>
    <meta charset="UTF-8">
    <meta http-equiv="X-UA-Compatible" content="IE=edge">
    <meta name="viewport" content="width=device-width, initial-scale=1.0">
    <title>Document</title>
</head>
<body>
    <div>
        <button onclick="remove()">删除一条数据</button>
        <button onclick="add()">新增一条数据</button>
        <button onclick="exit()">修改一条数据</button>
        <button onclick="all()">新增一条数据,并修改一条数据,并删除一条数据</button>
    </div>
</body>
</html>
<script src="https://d3js.org/d3.v5.min.js"></script>

<script>
    const svg = d3.select('body')
                .append('svg')
                .attr('width', 500)
                .attr('height', 500);


    let data = [{id: 1, fill: 'red', x: 20, y: 20}, {id: 2, fill: 'blue', x: 40, y: 40}, {id: 3,fill: 'yellow',x: 60, y: 60}, {id: 4, fill: 'black',x: 80, y: 80}];

    draw()
function draw() {
    //修改层
    const update = svg.selectAll('rect')
       .data(data)

    update.attr('x', (d,idx) => d.x)
        .attr('y', (d,idx) => d.y)
        .attr('fill', (d) => d.fill)

    //渲染层
    const enter = update.enter();

    //删除层
    const exit = update.exit();

    enter.append('rect')
       .attr('width', 20)
       .attr('height', 20)
        .attr('x', (d,idx) => d.x)
        .attr('y', (d,idx) => d.y)
        .attr('fill', (d) => d.fill)
       .attr('stroke', 'blue')
       .attr('strokeWidth',1)

    exit.remove()
}

function remove() {
    data.pop();
    draw();
}

function add() {
    data.push({id: Math.random() * 200, fill: 'violet', x: 120, y: 120});
    draw();
}

function exit() {
    data[0].fill = 'orange';
    draw();
}

function all() {
    data.shift();
    data.push({id: Math.random() * 200, fill: 'green', x: 150, y: 150});
    data[0].fill = 'pink';
    console.log(data,'data')
    draw();
}


</script>效果呈现:可能你会发现点击最后一个按钮没反映尼(问题在于数据绑定的.data(data))要改成让他识别id.data(data, d => d.id)

正确的数据驱动函数
<!DOCTYPE html>
<html lang="en">
<head>
    <meta charset="UTF-8">
    <meta http-equiv="X-UA-Compatible" content="IE=edge">
    <meta name="viewport" content="width=device-width, initial-scale=1.0">
    <title>Document</title>
</head>
<body>
    <div>
        <button onclick="remove()">删除一条数据</button>
        <button onclick="add()">新增一条数据</button>
        <button onclick="exit()">修改一条数据</button>
        <button onclick="all()">新增一条数据,并修改一条数据,并删除一条数据</button>
    </div>
</body>
</html>
<script src="https://d3js.org/d3.v5.min.js"></script>

<script>
    const svg = d3.select('body')
                .append('svg')
                .attr('width', 500)
                .attr('height', 500);


    let data = [{id: 1, fill: 'red', x: 20, y: 20}, {id: 2, fill: 'blue', x: 40, y: 40}, {id: 3,fill: 'yellow',x: 60, y: 60}, {id: 4, fill: 'black',x: 80, y: 80}];

    draw()
function draw() {
    //修改层
    const update = svg.selectAll('rect')
       .data(data, d => d.id)
    update.attr('x', (d,idx) => d.x)
        .attr('y', (d,idx) => d.y)
        .attr('fill', (d) => d.fill)

    //渲染层
    const enter = update.enter();

    //删除层
    const exit = update.exit();

    enter.append('rect')
       .attr('width', 20)
       .attr('height', 20)
        .attr('x', (d,idx) => d.x)
        .attr('y', (d,idx) => d.y)
        .attr('fill', (d) => d.fill)
       .attr('stroke', 'blue')
       .attr('strokeWidth',1)

    exit.remove()
}

function remove() {
    data.pop();
    draw();
}

function add() {
    data.push({id: Math.random() * 200, fill: 'violet', x: Math.random() * 200, y: Math.random() * 200});
    draw();
}

function exit() {
    data[0].fill = 'orange';
    draw();
}

function all() {
    data.shift();
    data.push({id: Math.random() * 200, fill: 'green', x: 150, y: 150});
    data[0].fill = 'pink';
    console.log(data,'data')
    draw();
}


</script>
总结
其实大家可以对比下canvas,canvas的话你要是想改变、删除、新增、修改一个元素的话都是一直要重绘,d3+svg的数据绑定帮咱们解决了不用再去清除重绘的优点。写好绘制函数了后 数据再有更改调用绘制函数就好了,再有一个对数据监听的watch就更棒了,大家可以去参看我之前实现的一个自己的watch
阅读量:638
点赞量:2
收藏量:1